Friday, 24 May 2013

Easy Peasy Ginger Beer - via Jamie Oliver


(Jamie Oliver) - Ginger beer is one of my favourite things in the world, especially blooming good in the summer when it's getting hot. I can't think of anything more sexy than having a big jug of iced ginger beer on the table with a barbecue on a hot day. The classic real ginger beers use a starter, and these are fantastic but slow, so here's my shortcut for getting amazing results taking hardly any time.

Serves 4-6

Ingredients

140 g fresh ginger
4 tablespoons muscovado sugar
2-3 lemons
1 litre soda water or sparkling mineral water
a few sprigs of fresh mint


Method

First of all you need to grate your ginger on a coarse cheese grater – you can leave the skin on if you like. Put the ginger with its pulpy juice into a bowl and sprinkle in your muscovado sugar. Remove the rind from 2 of your lemons with a vegetable peeler, add to the bowl, and slightly bash and squash with something heavy like a pestle or a rolling-pin. Just do this for 10 seconds, to mix up all the flavours. Squeeze the juice from all 3 lemons and add most of it to the bowl. Pour in your fizzy water or soda water. 

Allow to sit for 10 minutes and then taste. You may feel that the lemons are slightly too sour, therefore add a little more sugar; if it's slightly too sweet, add a little more lemon juice. To be honest, these amounts are always a little variable so just follow your own taste. Pass the ginger beer through a coarse sieve into a large jug and add lots of ice and some sprigs of mint.


Friday, 17 August 2012

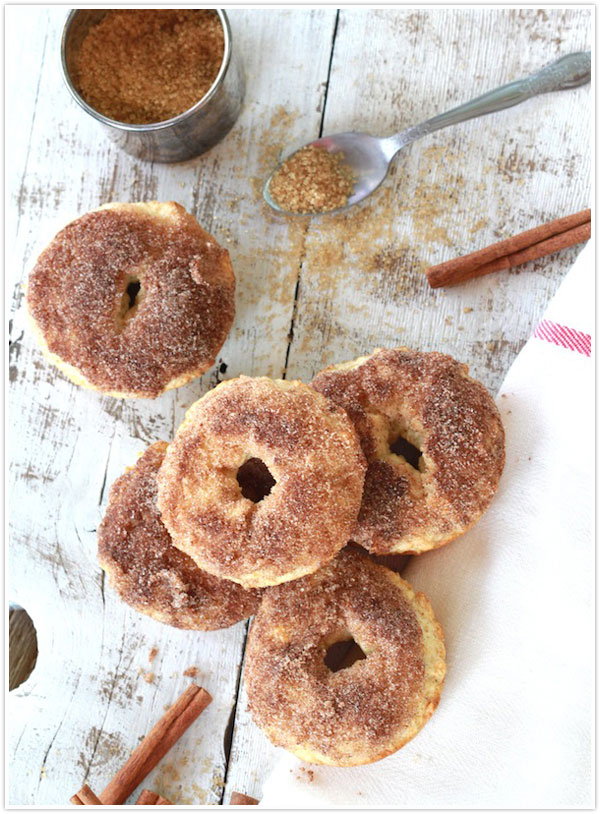
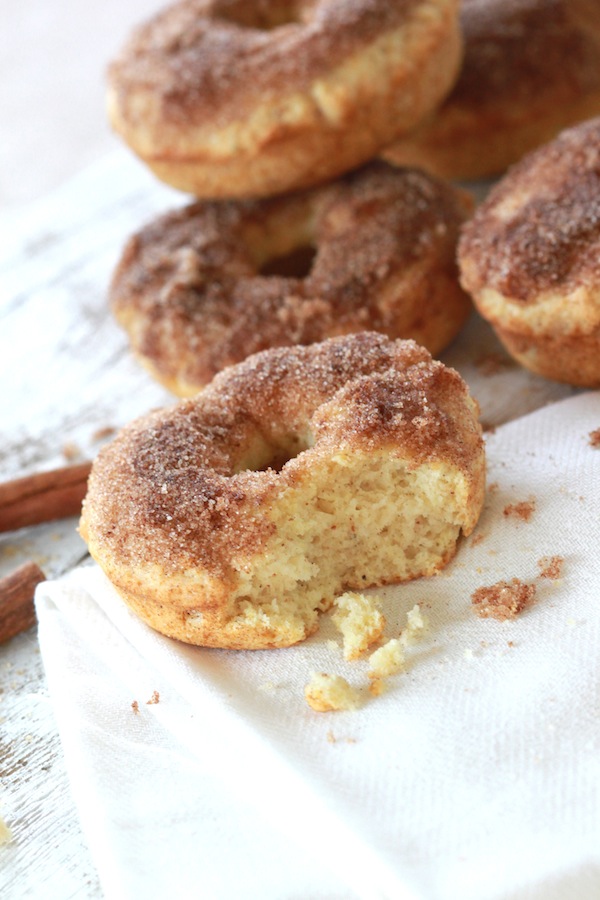
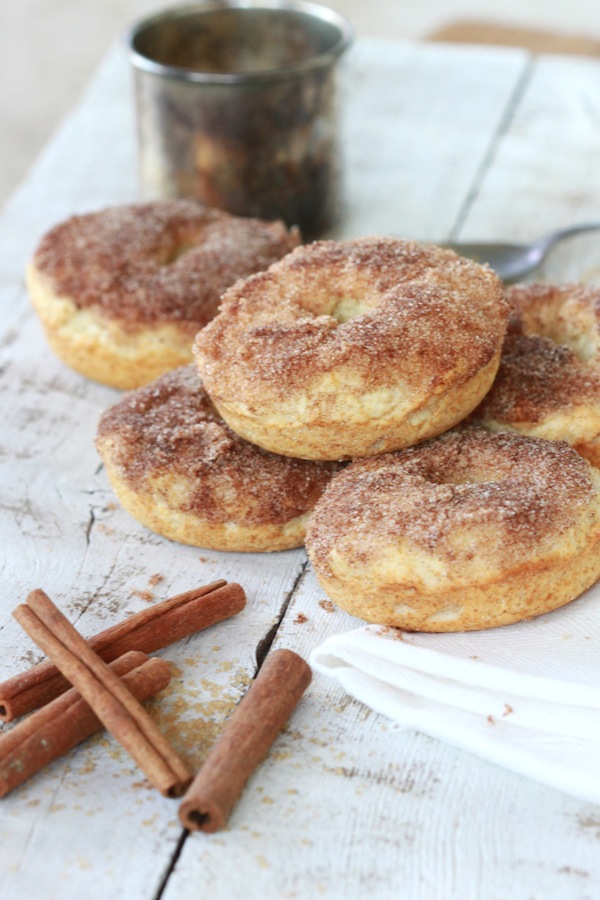
Baked French Breakfast Donuts...


5 tablespoons unsalted butter, room temperature
1/2 cup sugar
1 egg, beaten
1 1/2 cups flour
2 1/4 teaspoons baking powder
1/4 teaspoons salt
1/2 teaspoon nutmeg
1/2 cup milk (I used whole milk)
~
3 tablespoons unsalted butter, melted
1/2 cup sugar
1 tablespoon cinnamon

Preheat oven to 180°C (350°F/Gas Mark 4). Coat donut pan generously with nonstick cooking spray. Set aside.

Cream together butter and sugar until fluffy.  Add egg; mix well.

(In a seperate bowl) Sift flour, baking powder, salt and nutmeg together. Add dry ingredients alternately with milk.

Fill donut tins half full. Bake 15-20 minutes. Take out of pan immediately and swirl tops into melted butter, then sugar and cinnamon mixture. 

Makes 6-7 big donuts.

*Note:  These work just as well in a muffin tin, too!

Thursday, 16 August 2012

American Blueberry Pancakes...

Makes 10 pancakes

Preparation and cooking times
Cook 35 mins

 Low-fat


Ingredients
200g self-raising flour
1 tsp baking powder
1 egg
300ml milk
knob butter
150g pack blueberries
sunflower oil or a little butter for cooking
golden or maple syrup

Mix together the flour, baking powder and a pinch of salt in a large bowl. Beat the egg with the milk, make a well in the centre of the dry ingredients and whisk in the milk to make a thick smooth batter. 

Beat in the melted butter, and gently stir in half the blueberries.

Heat a teaspoon of oil or small knob of butter in a large non-stick frying pan. Drop a large tablespoonful of the batter per pancake into the pan to make pancakes about 7.5cm across. 

Make three or four pancakes at a time. 

Cook for about 3 minutes over a medium heat until small bubbles appear on the surface of each pancake, then turn and cook another 2-3 minutes until golden. 

Cover with kitchen paper to keep warm while you use up the rest of the batter. Serve with golden syrup and the rest of the blueberries.

Nutrition per Serving:
108 kcalories, protein 4g, carbohydrate 18g, fat 3 g, saturated fat 1g, fibre 1g, salt 0.41 g

Saturday, 18 February 2012

Roasted Parmesan Green Beans...

Tender crisp green beans roasted to perfection, topped with shredded parmesan cheese.
 This is the easiest way to prepare the best tasting green beans, picky kid approved!


Tuesday, 4 October 2011

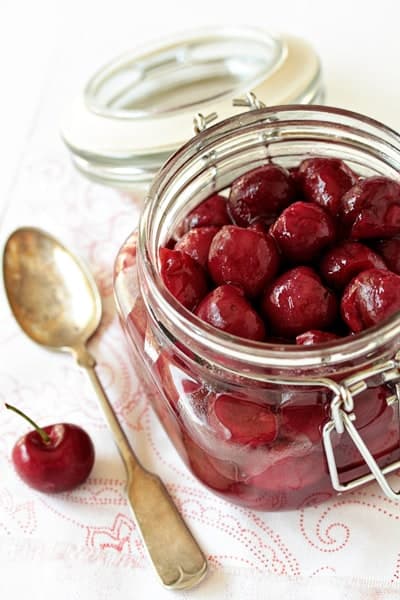
Homemade Cherry Pie Filling...


INGREDIENTS:
5 to 6 cups fresh pitted cherries, about 2 1/2 to 3 pounds ( I used Bing)
1/2 cup water
2 tablespoons fresh lemon juice
2/3 cup granulated sugar
4 tablespoons cornstarch
1/4 teaspoon almond extract

DIRECTIONS:
In a saucepan over medium heat, combine cherries, water, lemon juice, sugar and cornstarch. Bring to a boil; reduce heat to low and cook, stirring frequently, for about 10 minutes. Stir in almond extract. Cool slightly before using as a topping.

NOTES:
- If using sour cherries, you will need to adjust the amount of sugar. I’d recommend starting about ¾ cup and working your way up if more sweetness is needed.
- Refrigerate leftover fresh cherry pie filling in a sealed container for up to 2 days.
- I have not tried freezing this cherry pie filling, but if you do, please let me know.
- Recipe adapted from about.com.

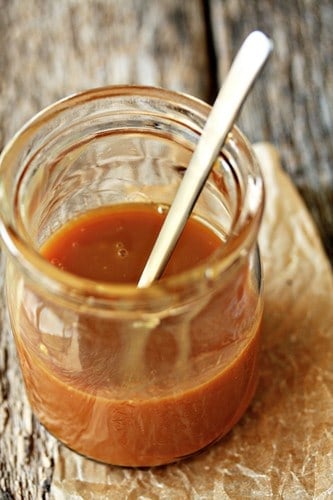
How to Make Homemade Caramel Sauce...

Fundamental Safety:
- Give your undivided attention to the caramel sauce while you are preparing it.
-Caramel is HOT! Be careful. For reference- Water boils at 212°F, we are taking this sugar mixture to 380°F, so it’s incredibly hot.
-When you add the heavy cream to the pot of molten sugar, it will bubble violently and steam will escape. Stand back and keep your face away from the pot!
-Avoid a caramel catastrophe by making sure your heavy bottomed pot is large enough. Trust me; you do not want this caramel sauce to boil over onto your stove. It will bring you to tears. When you’re done, be sure to soak your pot and tools with hot water to help the cleaning process.
-Make sure your stirring utensil is heat proof. I typically use a wooden spoon or a silicone spatula.


Yield | 1 cup
Ingredients:
1 cup sugar
1 tablespoon corn syrup
1/4 liquid cup water
1/2 liquid cup heavy cream, heated until warm
2 tablespoons unsalted butter, softened
½ teaspoon fine grain sea salt
1 teaspoon pure vanilla extract

Directions:
1. In a heavy saucepan (at least 5 cup capacity), stir together the sugar, syrup, and water until the sugar is completely moistened. Place your candy thermometer into the pot taking care that it is tip in immersed into the sugar mixture.
2. Heat, stirring constantly, until the sugar dissolves and the syrup is bubbling. Stop stirring completely and allow it to boil undisturbed until it turns a deep amber (like the color of Bass Ale) (380°F.). Immediately remove it from the heat and slowly and carefully pour the hot cream into the caramel. It will bubble up furiously.
3. Use a high-temperature heat-resistant rubber spatula or wooden spoon to stir the mixture until smooth, scraping up the thicker part that settles on the bottom. If any lumps develop, return the pan to the heat and stir until they dissolve. Stir in the butter and salt. The mixture will be streaky but become uniform after cooling slightly and stirring.

Allow the sauce to cool for 3 minutes. Gently stir in the vanilla extract.

Storage: 
Keep at room temperature for up to 3 days; refrigerated, about 3 months. To reheat, simply place in a microwave safe container and heat for about 45-60 seconds. Stir well.

Tempting Twist:
Use fresh vanilla bean instead of vanilla extract. Simply scrape the seeds from inside ½ vanilla bean. Place the seeds and pod into the cream while it’s warming. Remove pod from the cream before adding to the hot sugar mixture.


"Today is the beginning of a new recipe series I’m dubbing Fundamentals. I get a lot of emails from new bakers asking for basic recipes, tips, and product recommendations that will get them started with their newly acquired baking addiction.
     While I can’t guarantee rock star status, I can provide you with some practical tips and simple tested recipes that work for me in my kitchen. The first recipe I am going to try and demystify is caramel, more specifically homemade caramel sauce.
     I have a confession. Making caramel scares me. I love caramel, whether it’s by itself, sprinkled with sea salt, covered in peanuts, enrobed with nougat…well you get point. Although my love for caramel has been present for many, many years, I just recently started to make my own.
     There have been some serious failures along one of which required the disposal of a pan. Yep, I tried to clean that sucker for days, so I ended up chucking it into the trash. Bottom line, caramel is finicky, it goes from perfect to a burnt mess in the blink of eye, but when you nail it, the outcome is extraordinary. Plus, you’ll never have to buy that overly sweet jarred stuff again!" via mybakingaddiction.com

Fundamental Information:
-Caramel is essentially melted sugar.
-There are two basic ways to make caramel: the dry method and the wet method. The dry method involves slowly heating sugar until it melts and is deemed as a bit more difficult. The wet method is more common and is what you will find in today’s recipe.
-In the wet method, granulated sugar is dissolved in water and then boiled until the water starts to evaporate. As the water escapes, the mixture goes through a series of stages that indicates the ratio of water and sugar.

Fundamental Gear:
-heat safe spatula or wooden spoon
-heavy bottomed pot (non-stick is easier to clean)- If using non-stick, it may be difficult to know if your caramel has reached the desired shade of amber. Simply use a heat safe utensil to remove a few drops of caramel to a white plate.
-reliable candy thermometer- you will risk burning your sugar if you don’t have an absolutely accurate thermometer; cheapos from the supermarket typically don’t cut it


Uses for Homemade Caramel Sauce:
-eat it with a spoon
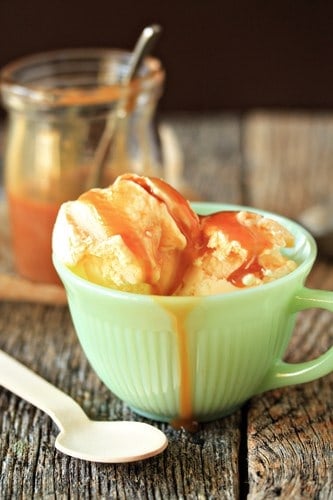
-spoon it over your favorite ice cream
-drizzle it over your favorite baked goods
-stir it into your morning latte to create a homemade caramel macchiato
-use it as a dip for fresh apple slices
-jar these up and pass along to friends and family; 
(just be sure to tell them it needs to be stored in the refrigerator)

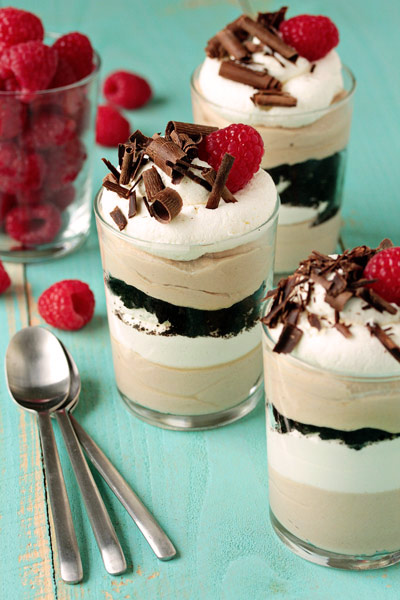
Easy Tiramisu Trifles...

From start to finish this dessert will take you less than 20 minutes to create and they can even be made in advance. Just whip them up in the morning and store them in the refrigerator until you’re ready to serve.
4 Servings

INGREDIENTS:

FOR THE BASE
1 cup heavy whipping cream
1/4 cup granulated sugar
1 cup Sargento® Ricotta Cheese, any style
1 tablespoon unsweetened cocoa powder
1 tablespoon Kahlua
1 teaspoon instant espresso granules

FOR THE LAYERING
1 cup heavy cream, whipped with 2 tablespoons granulated sugar
1/2 cup chocolate cookie crumbs

FOR THE GARNISH
fresh raspberries
chocolate shavings

DIRECTIONS:
1. Combine whipping cream and sugar in food processor bowl fitted with metal blade.

2. Process 1 minute, or until cream is stiff. Transfer whipped cream to a medium bowl and set aside. (Do not clean bowl of food processor.)

3. Combine cheese, cocoa powder, Kahlua and instant espresso granules in food processor bowl. Process until blended. Add cheese mixture to bowl with whipped cream; fold in with rubber spatula until no white streaks remain.

4. Transfer to dessert glasses.

TRIFLE ASSEMBLY
Create the Tiramisu base according to recipe directions. Layer it with freshly whipped cream and chocolate cookie crumbs. Finish them off with a sprinkling of chocolate shavings and fresh berries.

NOTES:
- Recipe adapted from Sargento Cheese Tiramisu Custard recipe.
- Recipe can be made in advance and stored in the refrigerator for up to one day before serving.
- If you are not a fan of Kahlua, substitute it for 1 teaspoon of pure vanilla extract.


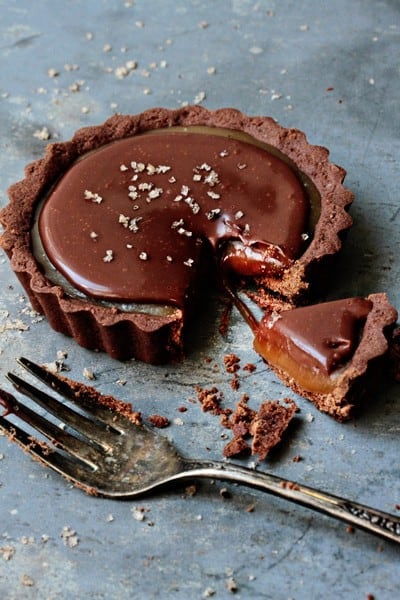
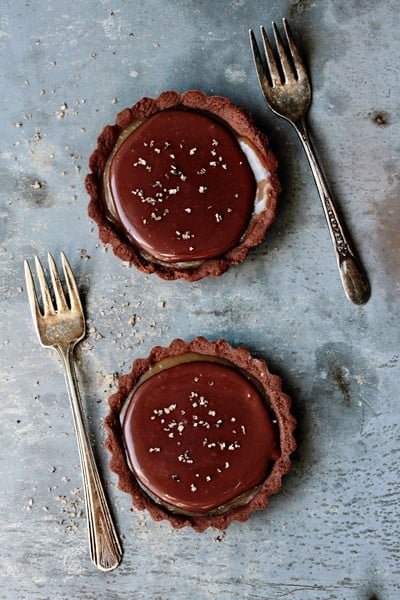
Chocolate Caramel Tarts...

These tarts are not only decadent, rich and buttery, 
it’s knock-your-socks-off good!
Serves 6

INGREDIENTS:

FOR THE CRUST
1 1⁄2 cups flour
1⁄4 cup plus 1 tablespoon dutch-process unsweetened
cocoa powder
1⁄4 teaspoon. kosher salt
10 tablespoons unsalted butter, cubed and softened
1⁄2 cup plus 2 tablespoons. confectioners' sugar
2 egg yolks, room temperature
1⁄2 teaspoon pure vanilla extract

FOR THE CARAMEL
1 1⁄2 cups sugar
3 tablespoons light corn syrup
1⁄4 teaspoon kosher salt
6 tablespoons water
6 tablespoons unsalted butter
6 tablespoons heavy cream
1 tablespoon sour cream
1 teaspoon pure vanilla extract

FOR THE GANACHE
1⁄2 cup heavy cream
4 oz. Scharffen Berger Bittersweet Chocolate, finely chopped
Vanilla Fleur de Sel for garnish (optional)

DIRECTIONS:
1. Prepare the Crust: In a medium bowl, combine flour, cocoa powder, and salt; set aside. Using a stand mixer fitted with the paddle attachment, or in a large bowl with a electric hand mixer, cream the butter and sugar until light and fluffy; mix in yolks and vanilla. Add in dry ingredients. Divide dough into 6 equal portions. Evenly press each portion into the bottoms and sides of 6 3.5-inch tartlet pan with removeable bottoms. Refrigerate tartlet shells for 30 minutes. Preheat oven to 350 degrees F, prick the tart shells all over with a fork. Bake in preheated oven until cooked through, about 13-15 minutes. Transfer to a rack and let cool.

2. Prepare the Caramel: In a medium saucepan over medium heat, whisk together sugar, corn syrup, salt, and 6 tbsp. water and bring to a boil. Cook, without stirring, until a candy thermometer inserted into the syrup reads 340°. Remove pan from heat and whisk in butter, cream, sour cream and vanilla (the mixture will bubble up) until smooth. Pour caramel into cooled tartlet shells and let cool slightly; refrigerate until firm, about 3-4 hours.

3. Prepare the Ganache: In a medium saucepan over medium heat, bring cream to a boil. Put chocolate into a medium bowl and pour in hot cream; let sit for 1 minute, then stir slowly with a rubber spatula until smooth. Spoon ganache evenly over tartlets and refrigerate until set, 3-4 hours. If desired, sprinkle tart with sea salt and slice. Serve cold.

NOTES:
- My mini tartlet pans were 3.5 inches in diameter
- To make a full size 9 inch tart: Transfer dough to a 9" fluted tart pan with a removable bottom and press dough evenly into bottom and sides of pan. Refrigerate for 30 minutes. Prick the tart shell all over with a fork and bake until cooked through, about 20 minutes. Transfer to a rack and let cool. Fill with caramel chill for 4-5 hours and top with ganache and chill for 4-5 hours. Slice and serve cold.
- If you not have vanilla Fleur de Sel, a simple sea salt will work perfectly.
- Recipe adapted from Saveur


Monday, 3 October 2011

Lamb shanks with herb crumbs, asparagus and new potatoes...

Tom Kerridge’s famous meltingly tender lamb is the ideal dish for a spring weekend lunch or dinner
Prep time: 20 min
Cook time: 4 hrs 20 min
Serves:4

Ingredients:
vegetable oil, for frying
4 small English lamb shanks
3 carrots, peeled and cut into thirds
2 onions, peeled and cut into quarters
1.5 litres dark brown chicken stock
1 bouquet garni
400 g new potatoes
1 bunches mint
2 bunches asparagus, peeled
rapeseed oil, for dressing
1 bunches curly parsley
1 cloves garlic
50-100 g dry breadcrumbs
1 lemon, zest only

1. Preheat the oven to 130C/110C fan/gas 1/2. 

2. Heat a little vegetable oil in a large, flameproof casserole and cook the onions and carrots until caramelised. While the vegetables are cooking, prepare the lamb shanks. 

3. Heat a little vegetable oil in a heavy-based frying pan and sear the lamb shanks until browned all over. 

4. Add the browned lamb shanks to the caramelised vegetables, pour over the chicken stock and add the bouquet garni. Bring to the boil, cover with a lid, transfer to the oven and cook for 3-3½ hours, until the shanks are very tender. 

5. Remove the lamb from the casserole and keep warm. Pass the stock through a sieve, return to a clean saucepan and reduce on the hob to a nice sauce consistency. 

6. Put the potatoes into a saucepan of water with half the mint and a pinch of salt. Bring to the boil and cook until tender, then drain and keep warm. 

7. Blanch the asparagus in boiling salted water, dress in a little rapeseed oil and a sprinkle of salt and freshly ground black pepper and keep warm. 

8. Pulse the parsley, remaining mint and garlic in a blender until finely chopped and combine with the dry breadcrumbs and lemon zest. 

9. To serve, put a lamb shank on each plate, spoon over some sauce and then sprinkle with the breadcrumb mix. Accompany with the asparagus and new potatoes and a little extra sauce. 


Lamb shank tagine with couscous and apricots...

Clodagh McKenna's fragrant tagine recipe uses lamb shanks, a fashionable and thrifty cut of meat, ideal for slow cooking
Prep time: 20 min, plus 10 mins soaking
Cook time: 1 hr 15 min
Serves:2

Ingredients:
2 tbsp extra virgin olive oil
1 tbsp cumin seeds
1 onions, diced
4 sweet potatoes, diced
4 cloves garlic, crushed
2 lamb shanks
400 g canned chopped tomatoes
175 g dried apricots, roughly chopped
1 pinches black pepper

For the couscous:
2 tbsp blanched flaked almonds
200 g quick-cook couscous
2 tbsp extra virgin olive oil

1. Heat a heavy bottomed saucepan on a medium heat. Add the olive oil and the cumin seeds and fry for 2 minutes. Then add the onions, sweet potatoes and garlic. Mix well, cover and cook gently for 5 minutes. 

2. Add the lamp shanks and brown them on all sides. Add the canned tomatoes and dried apricots and season with salt and freshly ground pepper. Bring to the boil, cover and simmer on a low heat for 1 hour. 

3. Meanwhile, prepare the couscous. Heat a frying pan on a low heat, add the flaked almonds and dry-fry, tossing all the time as they burn quite easily, until light brown. 

4. Place the couscous in a large bowl, cover with lukewarm water and set aside for 10 minutes until the couscous has absorbed the water.  Transfer the couscous into a into a dish, toss with the olive oil and sprinkle over the fried flaked almonds. 

Serve the tagine on a bed of the couscous.


Lamb Shanks...

Antony Worrall Thompson gives lamb shanks a lift with long, slow cooking and a generous amount of red wine!


Prep time: 15 min
Cook time: 2 hrs 30 min
Serves:4

Ingredients:
4 lamb shanks
olive oil, for braising (to fill casserole about 1cm deep)
1 leek, roughly chopped
2 sticks celery
2 carrots, roughly chopped
2 onions, roughly chopped
1 head garlic, broken up into cloves (unpeeled)
1 bay leaf
1 sprig thyme
1 sprig rosemary
375 ml red wine
600 ml chicken stock

1. Take a casserole (or any oven-proof dish) and place on the hob over a high heat, pour in the olive oil and when hot, add the lamb shanks, turning occasionally until brown. 

2. Once nicely browned, remove the lamb from the pot and tip in the chopped leek, celery, carrot, onion and garlic cloves. Stir them all together and add the bay leaf, thyme and rosemary. These ingredients will all add flavour to the dish but won't be served at the end. 

3. Once the vegetables are lightly browned, place the lamb back into the pot, allowing it to rest on top of the vegetables. 

4. Pour in the red wine and chicken stock, and bring to the boil. 

5. Cover the pot with a lid or kitchen foil, and place in a 150oC/gas 2 oven to braise for 2 hours 30 minutes or up to 5 hours depending on the amount of lamb you use. Serve the lamb shanks with the cooking juices poured over the top.


Sunday, 2 October 2011

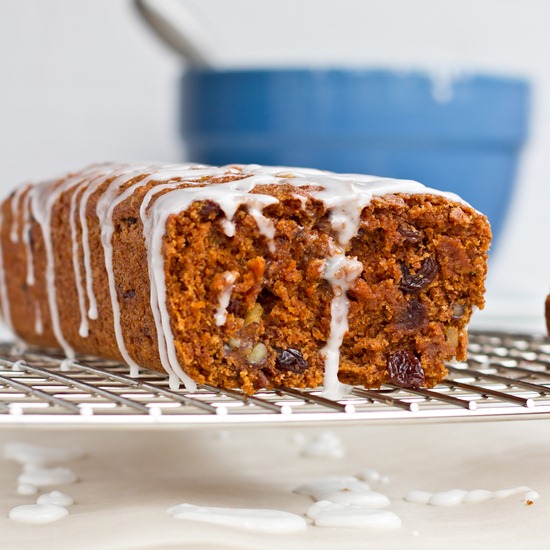
Whole-Grain Vegan Carrot Cake Loaf with Lemon Glaze...

1 small loaf, eight 1-inch slices

Ingredients:
1.5 cups finely grated carrot, unpacked
1 tbsp ground flax seed
1/2 cup pure maple syrup
3/4 cup almond milk (or other non-dairy milk)
1/3 cup light extra virgin olive oil (or oil of choice)
1.5 tsp pure vanilla extract
1/2 tsp apple cider vinegar
2 tsp freshly grated lemon zest
1.5 cups whole grain spelt flour
2 tsp ground cinnamon
1/2 tsp ground ginger
2 tsp baking powder
1/2 tsp baking soda
1/4 tsp kosher salt
1/2 cup raisins, soaked for 10 minutes & drained
1/4 cup walnuts, chopped
Lemon glaze: 1/2 cup icing sugar whisked with 1 tbsp fresh lemon juice (or to taste)

Directions:
1. Preheat oven to 350F and line a small loaf pan (20cm x11cm x 6cm) with parchment. Lightly grease the parchment and sides of pan with oil and set aside. Note that the original recipe used an 8”x8” square pan so that would also work.
2. In a medium bowl, mix together the grated carrot, ground flax, pure maple syrup, almond milk, oil, vanilla, vinegar, and lemon zest. Set aside for at least two minutes while you gather the dry ingredients.
3. In another large sized bowl, whisk together the spelt flour, cinnamon, ginger, baking powder & soda, and salt. Pour the wet ingredients over the dry ingredients and stir until just combined (a few dry spots may remain). Fold in the raisins and chopped walnuts. Be careful not to overmix as spelt is a very delicate flour.
4. Pour into prepared pan and bake at 350F for 45 minutes or until a toothpick comes out clean. Cool for 10 minutes in the pan, and then transfer the loaf to a wire rack to cool completely. Drizzle on lemon glaze just before serving. 

Serves eight 1” slices. May be frozen. 

ohsheglows.com

Peanut Butter & Dark Chocolate Shortbread Bars...

YUMMM!  I don't think the word "delicious" can even begin to describe these cute little baby bites!  The "buttery" vanilla shortbread, the soft peanutty filling, the smooth chocolatey topping, mmmm. . .

 Peanut Butter & Dark Chocolate Shortbread Bars: 
(no-bake, GF, vegan*, low-glycemic, high-protein)
(makes 9 big squares or 36 bites)

Shortbread Crust:
96g (1 cup) Rolled Oats (old-fashioned, gluten free if you like), blended to a flour
48g (1-1/2 scoops) Natural Vanilla Custard Protein Powder* (I used egg protein powder)
1/8 tsp Salt
105g (1/4 cup + 1 tbs) Brown Rice Syrup, microwaved for 15 seconds or until runny
28g (2 tbs) Coconut Oil
1/4 tsp Butter Extract**
1/2 tsp Hazelnut Extract
1/2 tsp Stevia Extract

Peanut Butter Filling:
256g (1 cup) Raw, Natural Peanut Butter (no sugar, salt or oil added)
189g (1/2 cup + 1 tbs) Honey*/***
1/2 tsp Stevia Extract
96g (3 scoops) Natural Vanilla Custard Protein Powder* (I used egg protein powder)
pinch of salt

Chocolate-Peanut Layer:
4oz 60% Cacao Chocolate****
32g (2 tbs) Raw, Natural Peanut Butter (no sugar, salt or oil added)
20 drops Stevia Extract*****

Directions (for the shortbread crust):
1.  Line a square brownie pan with parchment paper both ways for easy removal later
2.  Mix together the blended oats, protein powder and salt, then add in the brown rice syrup, coconut oil, butter/hazelnut/stevia extract.  Stir until everything is incorporated and even (you can use a hand mixer and a large bowl if you like)
3.  Press the mixture down into your brownie pan until every corner is even in height.  This batter makes just enough to fit the bottom of the pan.  Refrigerate for 20-30 minutes, or until firm and dry

Directions (for the peanut butter filling):
1.  In a large bowl, add the peanut butter, honey and stevia extract and stir.  Add in the protein powder and pinch of salt and stir until combined (you can use a hand mixer for this too).  It should look like a big, soft blob of peanut butter play-doh
2.  Press this onto the shortbread crust until even in height.  I would suggest using a pastry roller if you have one, but I used a rubber spatula.  Refrigerate for 20-30 minutes, or until firm

Directions (for the chocolate-peanut layer):
1.  Break up the chocolate into pieces, and microwave at thirty second intervals until melted
2.  Add the peanut butter and stir in until melted and incorporated
3.  Add the stevia extract five drops at a time, stirring after every 5 drops (too much at a time or too much in general will seize the chocolate, as noted below)
4.  Pour the mixture over the peanut butter layer (if the chocolate is too hot, let it cool a little bit) and spread until even.  Refrigerate until the chocolate has just barely hardened, then take it out and slice (this allows the chocolate so slice in nice lines rather than break, which happened to me because I refrigerated it overnight and then sliced them).  Store in the refrigerator covered with plastic wrap
5.  To serve, take out of the refrigerator to soften for 10 minutes, EAT!

These are best eaten close to room temp.  The fork slides easily into the bar and you get all three flavors in one scrumptious bite!


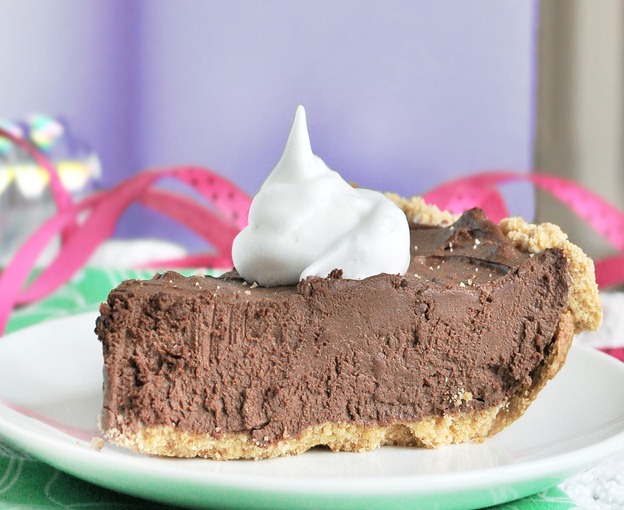
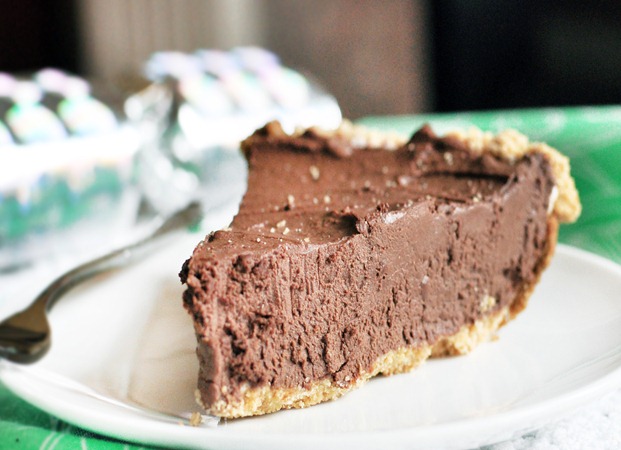
The Ultimate Chocolate Fudge Pie...

What if I told you that in less than ten minutes, you can make this:
The ultimate “does not taste healthy” dessert.

Warning: If you bring this chocolate pie to parties, people will devour every last chocolatey bite. And then they’ll realize they’re about to choke from gobbling it up so fast they forgot to stop and breathe. Sounds intense… but don’t worry. If you make this, you will never bring it to a party.

You won’t want to share.

Chocolate Fudge Pie

(Ridiculously easy, and insanely delicious)

1 package silken or firm tofu (such as 12.3 oz Mori-Nu or Mori-Nu lite)
1 tsp cocoa powder
1 tsp pure vanilla extract
2 T nondairy milk
scant 1/8 tsp salt
8 to 10 oz chocolate chips (a little over 1 and 1/3c or more)
2-3 T agave or other sweetener (When I make this just for me, I omit)
optional: extracts, flavorings, or liqueurs

  Melt the chocolate (either on the stove or in the microwave), then throw everything into a food processor and blend until super-smooth. Pour into a pie crust if desired. (I hate pie crust and therefore usually keep it crustless.) Fridge until chilled. This gets firmer and firmer, the longer it sits. (It’s firmer if you use firm tofu and more like mousse pie if you use silken.)

I promise you, everyone will rave about it, and no one will believe it has tofu!!

You truly can make this in just 5 minutes!

Nutritional Info:
143 calories
6 grams fat
2.5 grams protein
0mg cholesterol

These stats were calculated using 8 slices. Some of my testers say it’s so rich that it should be ten slices… and I say it’s so good that it should be six . (Add aboutu 7 calories per slice for each T of agave used.)


Monday, 5 September 2011

Chocolate and Berries Yogurt Dessert Recipe...


INGREDIENTS:
1 pouch (1 lb 1.5 oz) Betty Crocker® double chocolate chip cookie mix
1/4 cup vegetable oil
2 tablespoons water
1 egg
1 1/2 cups fresh raspberries
4 containers (4 oz each) Yoplait® Whips!® raspberry mist yogurt
1 cup whipping cream, whipped
2 tablespoons hot fudge topping
1 cup fresh blueberries

DIRECTIONS:
1. Heat oven to 350°F. In large bowl, stir cookie mix, oil, water and egg until soft dough forms.
2. On greased cookie sheet, drop dough by tablespoonfuls to make 6 cookies. Bake 8 to 11 minutes or until set. Cool 2 minutes, remove from cookie sheet to cooling rack.
3. Meanwhile, press remaining dough in bottom and 1 inch up sides of springform pan. Bake 8 to 10 minutes or until set. Cool completely, about 30 minutes.
4. In medium bowl, fold 1/2 cup raspberries into yogurt; spread evenly over crust. Crumble cookies; sprinkle over yogurt mixture. Carefully spread whipped cream evenly over cookie crumbs. Freeze 4 to 5 hours or until firm. Remove sides of pan.
5. Drizzle 1 tablespoon fudge topping over dessert. Top with blueberries and remaining raspberries. Drizzle with remaining fudge topping. Store in freezer.

Thursday, 1 September 2011

Blackberry Jam Shortbread ...


1 1/2 cups (3 sticks) unsalted butter, at room temperature
3/4 cup light brown sugar, firmly packed
3/4 cup granulated white sugar
2 teaspoons vanilla extract
3/4 teaspoon salt
3/4 cup almond flour or very finely ground almonds
2 3/4 cups all-purpose flour
1 1/2 cups seedless Blackberry Jam
powdered sugar, for dusting

Directions:
     Preheat oven to 325 degrees F. Spray 9x13-inch pan with nonstick spray.

Prepare shortbread
     In a large bowl, use an electric mixer to combine butter and sugars; beat until creamy. Add vanilla and salt and beat until well combined. Beat the almond flour and the all-purpose flour into the butter mixture on low speed, just until a smooth dough forms. Divide the dough in half. Wrap one half in plastic wrap and refrigerate for 30 minutes or so. Press the other half of the dough into the bottom of the prepared pan to form the bottom crust.
     Bake the crust until it is just beginning to turn light brown around the edges, about 20 minutes. Remove the pan from the oven. Place jam into a bowl and stir very well until it is nice and smooth. Spread the jam evenly over the partially baked crust. Crumble the refrigerated shortbread dough over the jam to form a crumbled topping. Return the pan to the oven and continue baking until the topping is firm and crisp and golden in color, about 30 minutes. Transfer to a wire rack and let cool completely. Sprinkle lightly with powdered sugar before cutting into bars.


breakfast-brunch-dessert.tumblr.com

White Chocolate Layer Cake...


Cake
2 ½ cups sifted cake flour 
1 tsp baking soda 
½ tsp salt 
4 ounces white chocolate, finely chopped 
½ cup boiling water 
1 cup (2 sticks) butter, softened 
2 cups sugar 
4 eggs, separated 
1 tsp vanilla extract 
1 cup buttermilk

Frosting:
6 ounces white chocolate, finely chopped 
12 ounces (1 ½ cups) cream cheese, softened 
3 tbsp butter, softened 
¾ tsp vanilla extract 
3 cups confectioners sugar

Directions:

Cake
     Heat the oven to 350F and grease three 8 inch round cake pans. Line the bottom of each pan with a circle of waxed paper or kitchen parchment and flour the pan. 
     Combine the flour, baking soda and salt in a medium bowl, and stir with a fork to mix them well. 
Bring 3 inches of water to an active simmer in the bottom of a double boiler or a saucepan that will accommodate a medium heat proof bowl so that it sits snugly over the water. Melt the white chocolate in the top of the double boiler or in the bowl over the simmering water. Stir often, and then pour in the ½ cup of boiling water and stir to mix well. Remove from the heat. 
     In a medium bowl, combine the butter and the sugar and beat with a mixed at medium speed to mix them together well. Add the egg yolks, one by one, beating each time to keep the mixture smooth. Add the white chocolate and the vanilla, and stir well to mix. 
     Add about a third of the flour mixture, and then about half of the buttermilk, beating with a mixer at low speed just long enough after each addition to make the flour or buttermilk disappear. Mix in another third of the flour, remaining buttermilk and then the last of the flour. 
     In a medium bowl, beat the egg whites at medium speed until they are foamy and opaque. Continue beating at high speed until they swell into thick, pillowy mounds and hold peaks that are stiff, but not fry. Add one third of the egg white mixture to the bowl of batter, and fold it in gently using a spatula. Add the remaining egg whites and continue to fold with a light touch, until the egg whites are blended in well, with only a few streaks showing. 
     Transfer the batter to the prepared pans and bake at 350F for 25-30 minutes until the cakes are golden brown, spring back when touched gently in the centre and are beginning to pull away from the sides of the pans. 
     Cool the cakes in the pans on wire racks or folded kitchen towels for about 30 minutes. Turn them out onto the racks and peel off the paper and turn them back the right way up to cool completely.

Frosting:
     In the top of a double boiler or a heatproof bowl, melt the white chocolate over hot, not simmering, water, stirring often. Remove from the heat once melted and let cool to lukewarm. Transfer the melted white chocolate to a large bowl, and add the cream cheese, butter and vanilla. Beat together at medium speed until you have a smooth sauce. Add the confectioners sugar and beat until smooth.

To Assemble:
     Place one layer, top side down on a cake stand or serving plate and spread it with about a fourth of the icing. Continue stacking and frosting each cake layer in the same way. Cover the sides of the cake with any remaining frosting. 
     Cover the cake and refrigerate for at least 1 hour. Set the cake out about 30 minutes before you want to serve it.


breakfast-brunch-dessert.tumblr.com

Tuesday, 23 August 2011

No Bake Raspberry-Lemon Cheesecake...


INGREDIENTS
For the crust:
3/4 cup graham cracker crumbs
1 tablespoon sugar
3 tablespoons unsalted butter, melted

For the filling:
2/3 cup sugar
zest on 2 lemons
1 (8 ounce) package cream cheese, softened
2 teaspoons fresh lemon juice
1 teaspoon pure vanilla extract
1 (8 ounce) tub frozen whipped topping, thawed
1 cup fresh raspberries, slightly mashed with a fork

DIRECTIONS
1. In a medium bowl, stir together the graham cracker crumbs and 1 tablespoon of sugar and melted butter. Evenly divide the crumbs between your individual serving dishes and press into the bottoms of the dishes to form a crust layer.
2. In a large bowl, mix together the sugar and lemon zest until the sugar becomes moist and fragrant. Add cream cheese and beat with an electric mixer until smooth. Add lemon juice and vanilla mixing to combine. Using a rubber spatula, fold in the whipped topping until well blended, then fold in the raspberries.
3. Evenly pipe or spoon the filling into individual serving dishes. Cover with plastic wrap and refrigerate for at least 2 hours before serving. If desired, garnish with fresh raspberries and a sprig of fresh mint.

RECIPE NOTES:
-If you make this into one pie, simply use pour the cream cheese mixture into a 9-inch graham cracker crust and chill for 3 hours before serving.
-This recipe tastes really delicious with blueberries and strawberries as well. Play around with different fruit combinations to create a wide range of flavors.
-I have not tried this recipe using fresh whipped cream, so I cannot attest to the results.

mybakingaddiction.com (Where I located the recipe from.)


Caramel Apple Cheesecake Bars...


Crust:
2 cups all-purpose flour
1/2 cup firmly packed brown sugar
1 cup (2 sticks) butter, softened 

Cheesecake Filling:
3 (8-ounce) packages cream cheese, softened
3/4 cup sugar, plus 2 tablespoons, divided
3 large eggs
1 1/2 teaspoons vanilla extract

Apples:
3 Granny Smith apples, peeled, cored and finely chopped
1/2 teaspoon ground cinnamon
1/4 teaspoon ground nutmeg

Streusel topping, recipe follows
1/2 cup caramel topping

Preheat oven to 350 degrees F.
     In a medium bowl, combine flour and brown sugar. Cut in butter with a pastry blender (or 2 forks) until mixture is crumbly. Press evenly into a 9x13 baking pan lined with heavy-duty aluminum foil. Bake 15 minutes or until lightly browned.
     In a large bowl, beat cream cheese with 3/4 cup sugar in an electric mixer at medium speed until smooth. Then add eggs, 1 at a time, and vanilla. Stir to combine. Pour over warm crust.
     In a small bowl, stir together chopped apples, remaining 2 tablespoons sugar, cinnamon, and nutmeg. Spoon evenly over cream cheese mixture. Sprinkle evenly with Streusel topping. Bake 40-45 minutes, or until filling is set. Drizzle with caramel topping and let cool. Serve cold and enjoy!

Streusel Topping:
1 cup firmly packed brown sugar
1 cup all-purpose flour
1/2 cup quick cooking oats
1/2 cup (1 stick) butter, softened 

In a small bowl, combine all ingredients. I like to really combine it by using my clean hands to thoroughly combine the butter into the mixture.
the-girl-who-ate-everything.com (where I located the original recipe from.)